
Introduction
Geometry Dash Texture Pack Installation Guide: PC, Android & Geode
Welcome! Transforming your Geometry Dash experience is easy once you know the right path. This guide provides clear, step-by-step instructions for PC (Vanilla), Android (Vanilla), and the Geode Mod Loader.
Choose your platform below to jump straight to the right section.
Watch the YouTube tutorial! (Spanish)
This method works for Geometry Dash installed via Steam or as a portable version. No additional software needed—just simple file management.

Step 1: Download your Texture Pack
Browse solubletexturepacks.com to find your favorite pack. You can find them by:
- Using the search bar for a specific texture pack
- Searching in the texture packs section on the website
- Direct links to the texture pack
Look for the PC Download button. This will provide a
.zip file containing the textures.
In this case, I selected the Zoink + TrollMachine texture pack for Geometry Dash 2.2081 from the menu using a custom search. Once on the official page, scroll down to see the available options.

Focus on the PC Download button. This downloads the Vanilla version of the Texture Pack, compatible with both external and Steam installations. This version includes only the textures (no mods), making it the fastest way to refresh your game’s look via the Resources folder.

Simply click the button to download your .zip archive (e.g.,
GDVersion-TexturePackName.zip). Once saved, you’re ready to proceed with the
installation.

This path works for the official Steam version, but also for portable versions or manually installed third-party builds.

Step 2: Extract and Install the Texture Pack
To do this, you must have already downloaded your texture pack from solubletexturepacks.com and be able to see it in your Windows file manager.

 DON’T HAVE A PROGRAM TO OPEN .ZIP
FILES?
Click to see how to install
one
DON’T HAVE A PROGRAM TO OPEN .ZIP
FILES?
Click to see how to install
one
Texture pack files will always come in .zip format, so
you’ll
need one installed. I recommend WinRAR, but you can install whichever
one
you prefer.

Just search for WinRAR on Google and download the latest version for Windows PC.

Once you’ve installed it and followed the installer steps on the official website, you’ll have access to WinRAR and can extract the file by right-clicking it in Windows File Explorer and selecting “Extract Here.” Alternatively, if you don’t want to extract everything directly into the current folder, click “Extract to [Folder Name]” and it will create a new folder with the files neatly inside. (By the way, my screenshot shows the Spanish language option, but you’ll see it in English.)

Once the .zip file is extracted, we will have a folder with the name of the texture
pack, containing all the resources ready to be installed in our Geometry Dash.


We will now go to Steam, open our game library, right-click on Geometry Dash, and look for an option called “Manage.” From there, click on “Browse local files.” This will take us directly to the local folder of our Geometry Dash installation on our PC.

And that’s it! As we can see, we now have access to the Geometry Dash folder containing the game’s core resources.

If you prefer to navigate directly, the default Steam path is usually:
C:\Program
Files (x86)\Steam\steamapps\common\Geometry Dash
For external/portable users: If you
installed the game manually, the Resources folder should be in the exact same
directory as your Geometry Dash launcher. You should find a structure similar to the screenshot
above.
Prevention is better than cure. Many times people run into issues, claiming they ruined their GD with a texture pack because uninstalling it caused problems. Before moving any new files, I highly recommend selecting all the files inside your Geometry Dash folder, copying them, and pasting them into a safe backup folder.
In this case, I’ll call it “GD copy,” but you can name it whatever you want. This ensures we keep all
the original .dll files and assets which are necessary for the game to function
correctly.
These files are not your Geometry Dash save data (stars, levels, coins); that’s stored safely in an entirely different folder. The files in this directory are only the assets required for the game to run on your computer.
COPY And PASTE into your backup folder (security folder):


Now we have a solid backup of the game’s Resource folder and core files. This will save us if we ever need to uninstall the texture pack or replace it without issues in the future.
Now we’ll go back to the extracted folder where we have our PC texture pack ready. Copy (or cut) all the files exactly as they are.

With those files copied, navigate back to your official Geometry Dash game folder. Paste the files directly into this directory. You now have an installed texture pack (pure vanilla, without the help of mods or plugins!).

There’s another option if you prefer a cleaner folder structure. I usually combine everything in the main directory (my recommended configuration for compatibility with Geode or MegaHack). However, if you don’t use mods and want a cleaner folder, simply copy the contents of the download and paste them directly into the `Resources` folder. This replaces original assets efficiently and works perfectly for vanilla users.

Once we’ve successfully pasted the files, we can open Geometry Dash on Steam. Note that you can manually delete specific things from the texture pack folder if you wish—like custom menu songs, icons, or buttons you don’t prefer—and the game launches nicely. Let’s Play!

Enjoy your new aesthetics!

Once you have your texture pack installed, returning to normal is incredibly easy thanks to the backup we made earlier. Simply go to your Geometry Dash directory, select everything except your backup folder, and delete it all.


Next, open your security backup folder, copy everything inside, and paste it back into the main Geometry Dash folder.

Done! Our Geometry Dash is completely restored and as good as new.

If something goes wrong with the installation, or you made a massive mistake configuring the pack, don’t worry—your account is not ruined. Simply go back to Steam, right-click Geometry Dash, and select Uninstall. Then reinstall it (basically freshly formatting everything) and try again to identify what went wrong.

If you need help with installation or personalized support, or assistance with any other issue, you can contact our experts through our Discord server by opening a ticket. Click here to see how. We look forward to hearing from you!
This method installs a custom APK with the texture pack pre-baked in. Since it replaces the entire app, follow the safety steps carefully to protect your progress.

Let’s try the Zoink + TrollMachine texture pack for Geometry Dash 2.2081 by scrolling on the homepage.

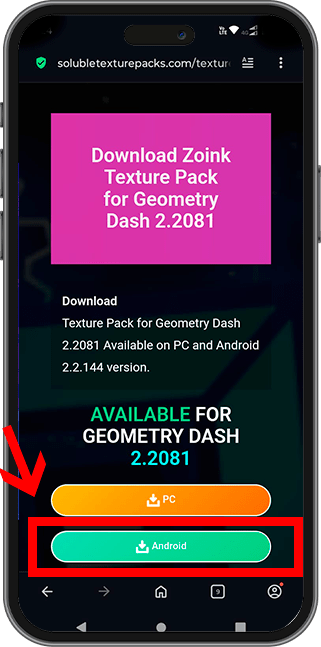

In this section, we’ll focus on the Android version. The download buttons for these are typically green for easier identification. This method is aimed at users who exclusively want vanilla Geometry Dash without installing any mods—equivalent to the version available on the Google Play Store. We highly recommend purchasing the original game from the official store when you can to support RobTop, the creator of the game.
If you use the official Play Store version, you’ll need the Geode method to install texture packs. Meanwhile, for this standalone APK method, you can choose between two versions depending on availability: Standard Android or Android with All Icons Unlocked.
Browse solubletexturepacks.com to find your favorite pack. You can find them by:
- Using the search bar for a specific texture pack
- Searching in the texture packs section on the website
- Direct links to the texture pack
Look for the green Android Download buttons (Standard or All Icons
Unlocked). This will provide a .zip file containing the
lancher installer.

Standard
The normal game exactly as you know it, just with the custom textures applied over the vanilla graphics.

All Icons Unlocked
Every icon and color is available from the start, including the texture pack; it’s purely visual, with no achievements or online modifications.
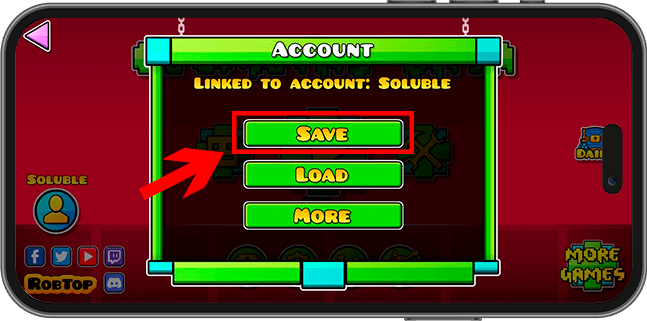
Step 2: Backup your Cloud Save
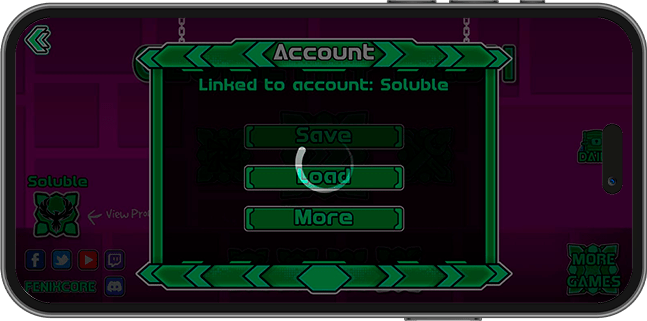
Before deleting the game, it is CRITICAL to save your progress to the cloud. This ensures your data will be available to restore later. Follow this sequence in your current game:


Step 3: Unlink and Uninstall
Now we must prepare the device by unlinking the account and removing the old app. This prevents conflicts when installing the new version, and with our data backed up in the cloud, we’ll be safe.


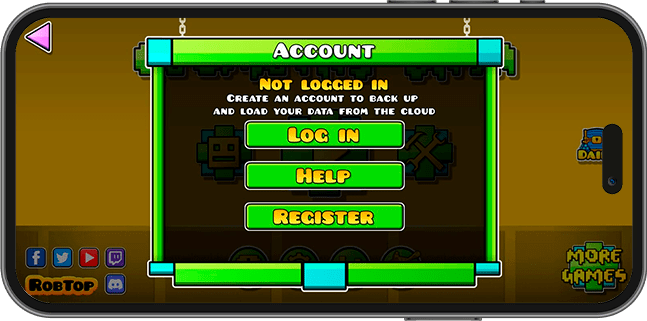
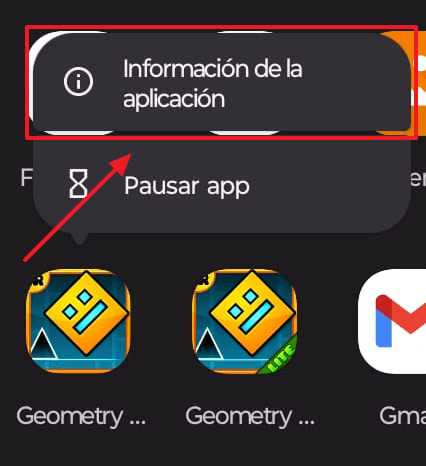
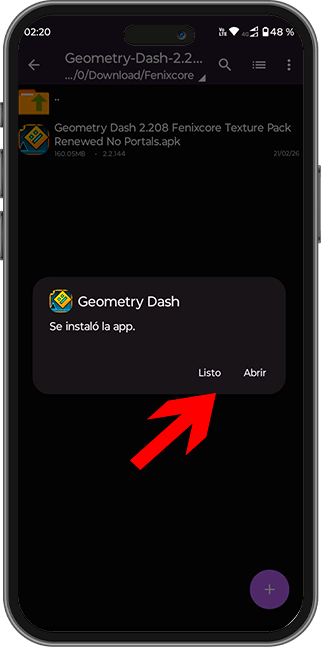
After unlinking, proceed to uninstall Geometry Dash from your phone. Now we’ll go to our applications menu and tap on the Geometry Dash icon and select application info. You are now ready to install the new texture pack for android.

Step 4: Extract and Install Texture Pack
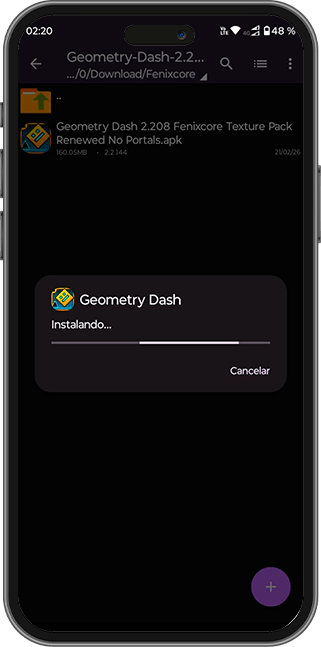
Open ZArchiver, find your downloaded .zip, and select
“Extract Here”. Open the resulting folder and tap the launcher to install it.
Tip: Enable “Install unknown apps” in your Android settings if prompted.
 DON’T HAVE A FILE EXTRACTOR?
Click to see how to install one
DON’T HAVE A FILE EXTRACTOR?
Click to see how to install one
To install the texture pack for Vanilla Geometry Dash on Android, you’ll
need a file extractor. We’ll use ZArchiver, a .zip file extractor. As mentioned in
the guide, all downloadable files will be in .zip format, as it’s more
user-friendly for file storage. Also, due to Google’s policies, I can’t share the file directly,
so it must be compressed.
Search for ZArchiver on Google Play, or you can click the following link.
https://play.google.com/store/apps/details?id=ru.zdevs.zarchiver

However, feel free to use any mobile app you prefer, as long as it can extract .zip
files. Make sure the app has this function.
The first thing we’ll do on our Android device after installing ZArchiver is go to our phone’s
downloads folder. This folder is usually there by default on most devices; just go to your main
downloads folder and you’ll find the texture pack file you want in .zip format.
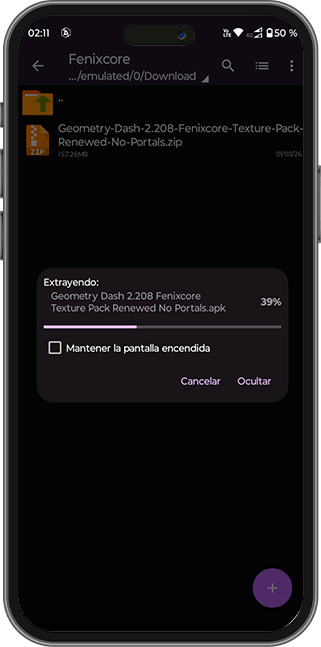
Once you’re there, tap and hold the .zip file and extract its contents with ZArchiver.
Then, wait for the extraction to complete.


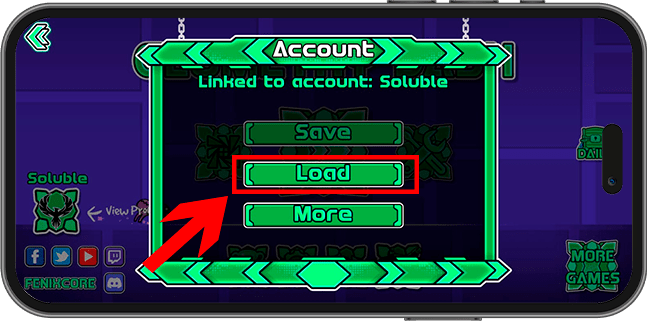
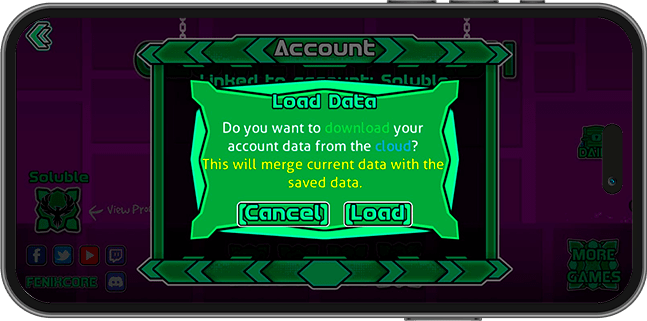
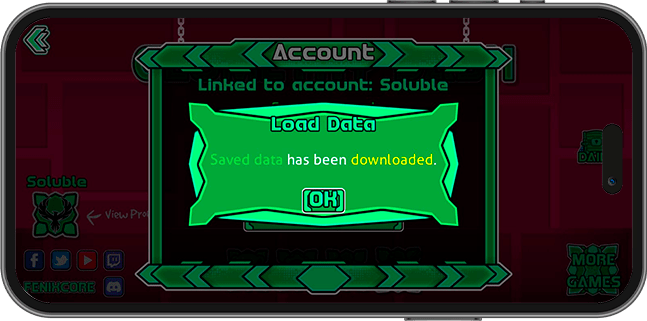
With the texture pack version for Geometry Dash now installed, the final step involves restoring your cloud data. By logging into your account and loading your saved progress, you can seamlessly retrieve all your stats, unlocked icons, and completed levels, ensuring that your data remains intact while enjoying your new texture pack.
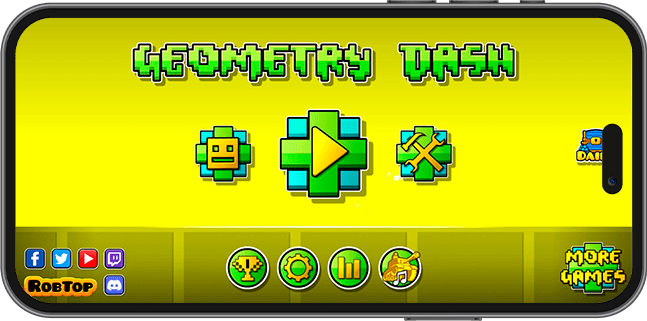
Once it’s finished, we’ll finally have the texture pack installed on our device, with all the textures for vanilla geometry dash.
Next, we will configure our account.
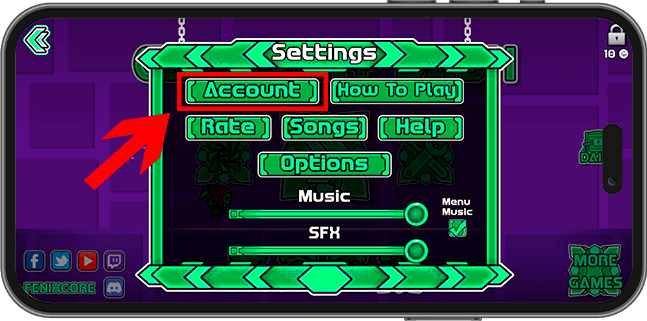
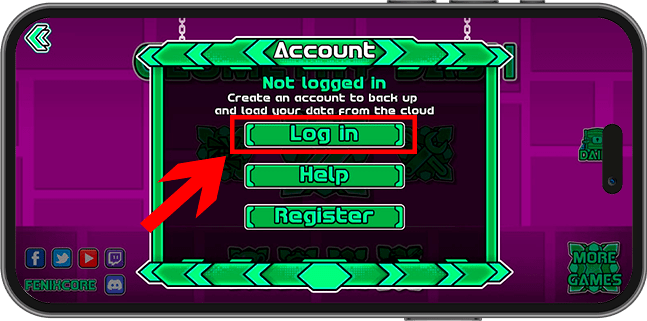
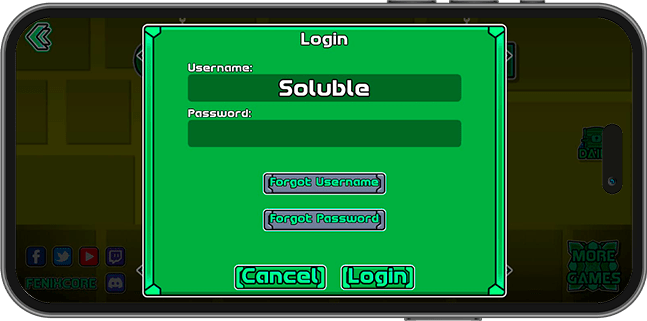
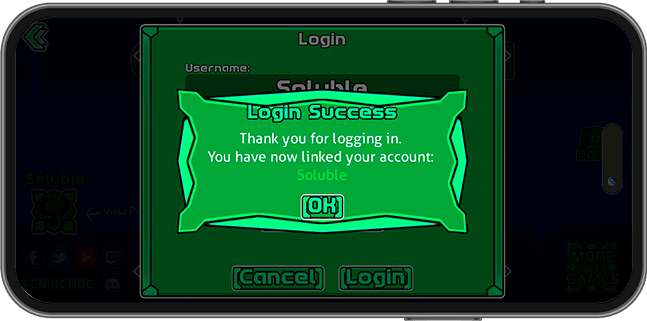
Once we have entered our account details and logged in, we should see something like “thank you for logging in,” and we can upload our data using the “load” button.
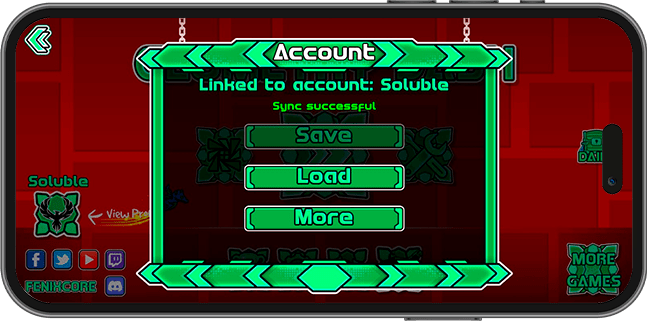
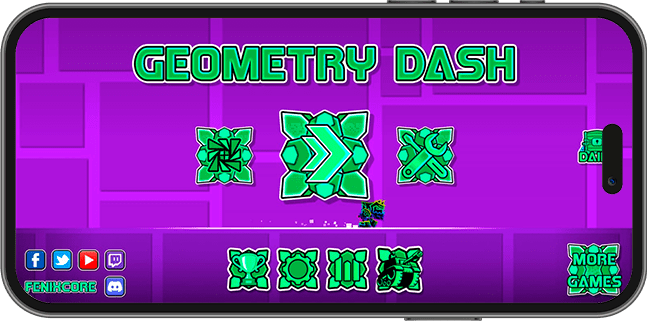
And that’s it, you can now enjoy the texture pack for Android Geometry Dash Vanilla!
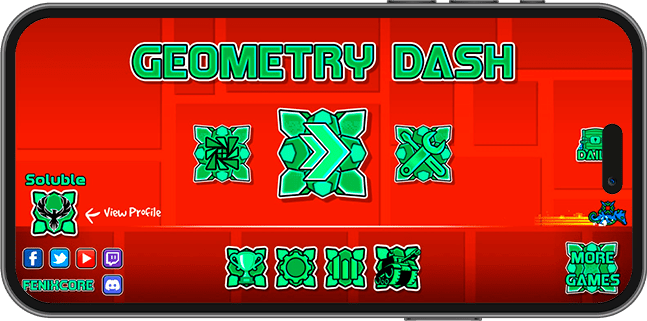

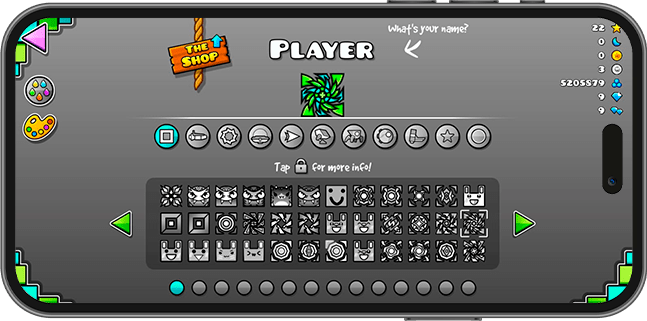
If you installed the Android version with all icons unlocked, you should see something like the screenshot—all icons unlocked. Could this get you banned? The short answer is a resounding no, but if you have more questions and want an explanation, you can consult the FAQ page.
Enjoy your new Android texture pack!
If you need help with installation or personalized support, or assistance with any other issue, you can contact our experts through our Discord server by opening a ticket. Click here to see how. We look forward to hearing from you!
Geode is the modern standard for modifying Geometry Dash. It handles texture packs using mods, meaning no file replacement is necessary. It is the safest and most versatile method for all platforms, including PC, Steam, Android, and macOS.
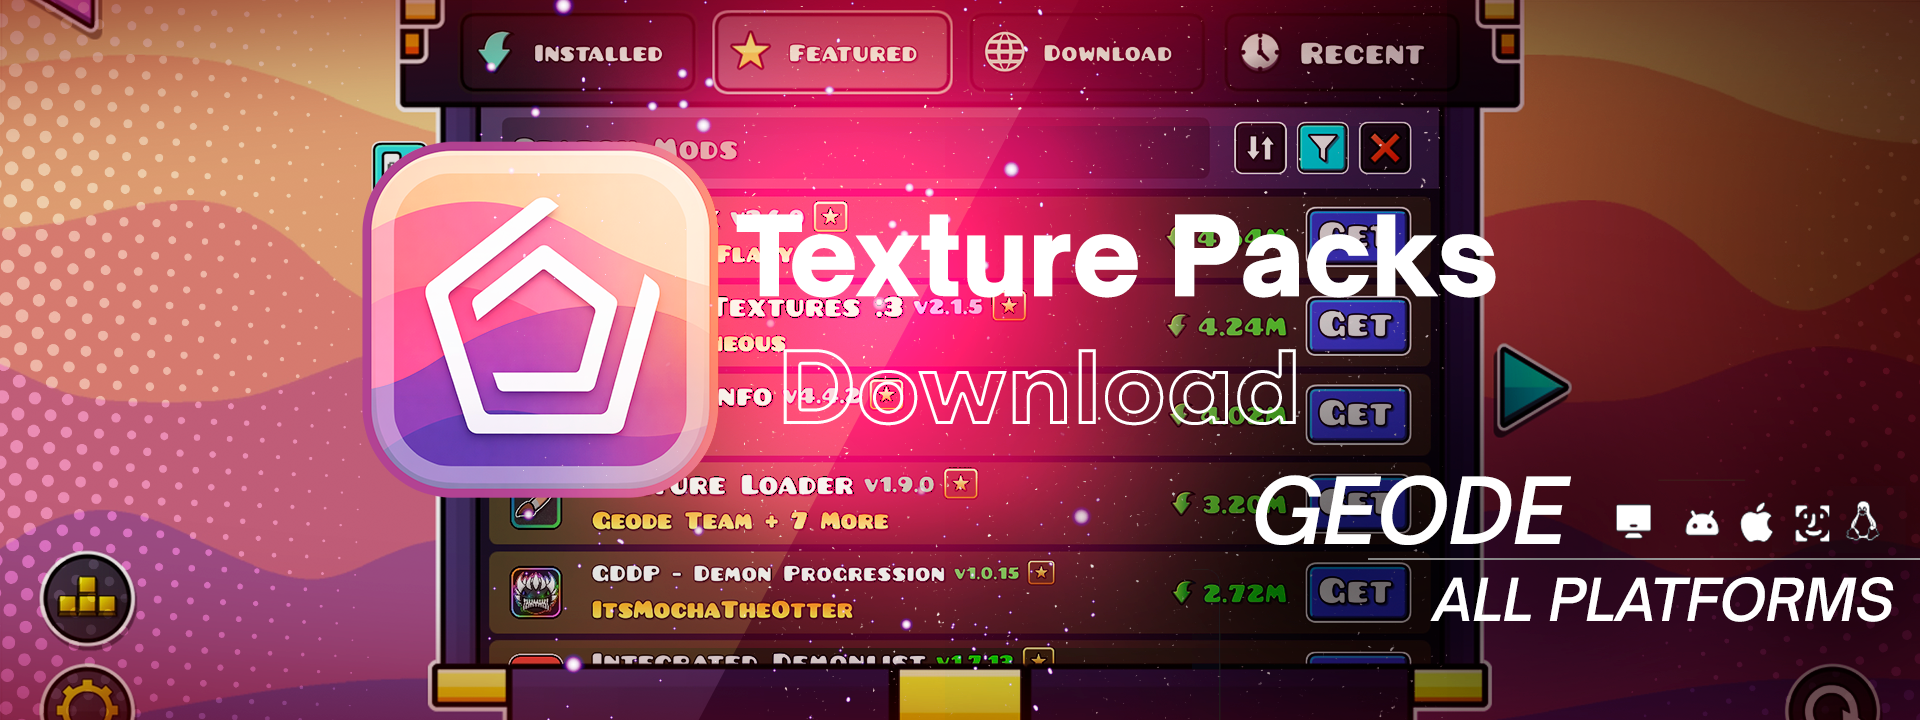
You need to have Geode installed first. Visit geode-sdk.org to download the loader for your platform (Windows, Android, macOS).
Geode allows you to switch between multiple texture packs instantly without creating folder backups. It’s practically perfect for players who frequently change their game’s look depending on their mood or the levels they play.
Watch the YouTube tutorial to install Geode on PC and Android! (Spanish)
Beware of videos claiming “one-click” Geode installs via AI bots or unofficial tools for PC Windows, Android, iOS and macOS. These often contain malware designed to steal your data.
For your safety, only use the official website:
Never download from:
- Random websites or AI chatbot installers
- “One-click” links shared in YouTube videos
Always verify that you are on the official geode-sdk.org domain.
- Geometry Dash installed on Steam or with an external launcher.
- Geode for PC installed.
- Required mods: Happy Textures :3 and Texture Loader + Dependencies.
- WinRAR or any file manager with file extraction capabilities.
Step 1: Download and Install Geode
Download Geode from the official website for PC geode-sdk.org and run the installer. If you already have Geode installed, safely skip this step.
 DON’T HAVE GEODE YET?
Click here to see how to
install it
DON’T HAVE GEODE YET?
Click here to see how to
install it
Select Download button for Geode for PC

Next, choose the Windows version.

Run the installer and follow the provided steps to install Geode directly into your Geometry Dash Steam directory or an external launcher folder.

The default path where Geode files should have installed looks like this:
C:\Program Files (x86)\Steam\steamapps\common\Geometry Dash
Done! You now have Geode fully installed.


Step 2: Install Texture Pack Mods
We’ll install mandatory mods that enable texture pack compatibility over popular Geode mods, alongside “Happy Textures” for customizable window colors.
In the Geode mod window (opened from the Geometry Dash menu), go to the Featured tab. We will want to search for and install “Happy Textures :3” by Alphalaneous and “Texture Loader” by the Geode Team.

To ensure proper loading and compatibility for texture packs downloaded from solubletexturepacks.com, it is mandatory to install Happy Textures and Texture Loader. We heavily utilize Happy Textures’ features to change UI window palettes and introduce custom sprites that vanilla Geometry Dash does not provide. Running without these can lead to broken graphics or missing UI assets.


If you don’t spot them right away, utilize the Search bar on the bottom right and type “texture”. The results should promptly include both tools.

Tap the blue Get button on both mods. I suggest beginning by acquiring Happy Textures; it will typically ask to download Texture Loader natively as a dependency, though installing them one by one is fine.


If this is your first time installing Geode, it will likely ask for mods like Alpha’s Geode Utils, ImagePlus, and Node IDs. You must accept these as well.
Promptly, Geode will require us to restart to mount the dependencies successfully. Click on Restart.

After reopening, click on the Geode button to check your installed mods list. Both loaders should be active and installed. For now, everything is set to learn how to prepare packs!

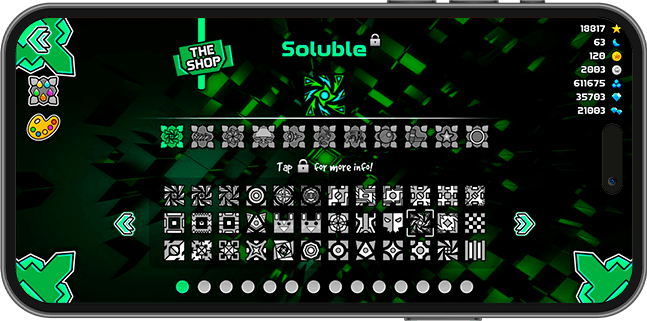
Head onto solubletexturepacks.com to download the packed ZIP archive for Geode by clicking its respective download link.

After finding your perfect pack and confirming the download, the archive will appear in your default
downloads folder (e.g. Geometry Dash version Name Texture Pack Geode By Soluble.zip).

If you don’t have a program to open .zip files, install one like WinRAR or 7-Zip. The texture packs are highly optimized to be 100% natively and visually compatible with Geometry Dash and the 40 most popular Geode mods.
DON’T HAVE A PROGRAM TO OPEN .ZIP
FILES?
Click to see how to install
one
Texture pack files will always come in .zip format, so
you’ll
need one installed. I recommend WinRAR, but you can install whichever
one
you prefer.
Just search for WinRAR on Google and download the latest version for Windows PC.
Right click the archive and select “Extract Here”.

You’ll then obtain a folder with the designated textures inside.

Click and you’ll see all the necessary files for the geometry dash vanilla textures + Mod textures. It will be compatible with most Geode mods and the 40 most popular Geode mods, including most possible textures. If you want to know the list of compatible mods, check the following link.

We’ll resume using the Geode Texture Loader mod that we installed to install our texture pack. To do this, we’ll access our computer’s local files to locate the folder where we’ll install our texture packs for Geode.
Open Geometry Dash with Geode active and click the Settings button

Select the Graphics button (if the texture loader was installed successfully, a Textures button will appear).

Here you’ll see a panel for Texture Packs. It will be completely empty right now, preventing us from equipping everything yet.

Click on the Folder icon in the lower right hand corner to directly open your system’s texture-pack storing location.

Clicking the directory button directly paths you inside:
C:\Program Files (x86)\Steam\steamapps\common\Geometry
Dash\geode\config\geode.texture-loader\packs
For now the directory continues to sit empty. Keep the window opened, it’s where everything
operates!

Retrieve that newly fetched Geode compatibility directory and move it here!
Reopen your extracted folder from Step 4. You must copy the actual directory itself holding the files
inside (e.g. Metallic Texture Pack) and paste it into the targeted texture pack loader
destination generated in Step 5.

To verify absolute precision, opening the directory you just pasted (e.g.
C:\Program Files (x86)\Steam\steamapps\common\Geometry Dash\geode\config\geode.texture-loader\packs\Metallic Texture Pack)
should exhibit the system files resembling
the view below.

Once we have completed the process of moving the texture pack folder, we will go back to Geode Texture Pack Loader, and in this window we will press the update button.

Behold! The texture pack instantly reflects on board, waiting for configuration.

Place the cursor over the list, click the arrow (+) to drag from “Available” to “Applied”, sending it from Available to Applied and concluding by tapping Apply to confirm actions directly.

You can enjoy your texture packs in Geode with Texture Loader, as many as you want! Just make sure to
save them in this path:
C:\Program Files (x86)\Steam\steamapps\common\Geometry Dash\geode\config\geode.texture-loader\packs\
which is the same folder that Geode takes you to once you click on Texture Loader mod.

- Geometry Dash installed from Play Store or manually with an external launcher.
- Geode for Android installed.
- Mods required: Happy Textures :3, & Texture Loader + Dependencies.
- ZArchiver or any Android file manager app with an option to extract files.
Beware of videos claiming “one-click” Geode installs via AI bots or unofficial tools. These often contain malware designed to steal your data.
For your safety, only use the official website:
Never download from:
- Random websites or AI chatbot installers
- “One-click” links shared in YouTube videos
Always verify that you are on the official geode-sdk.org domain.
Download Geode from the official website https://geode-sdk.org/ and then run the Android installer to get Geode. If you already have Geode installed, skip this step.
As a requirement, we need to have the official Geometry Dash installed and purchased from the Android Play Store.

You can also have it externally using a different launcher; we must have the Geometry Dash app installed before running Geode. If you don’t have Geometry Dash on the Play Store, you can directly install the game from our Android launcher. You just need to go to the No Trail Texture Pack to get the base game, but with the invisible trail activated. Due to Google’s policies, I cannot share the base game. The closest possible is this texture pack; you can install it and later overlay Geode.
DON’T HAVE GEODE YET?
Click here to see how to
install it
Visit geode-sdk.org and click on the Download button.

Next, choose the latest Android version and confirm the download.


Go to your Downloads folder and locate the Geode for Android launcher.

Select the launcher to install and confirm Geode’s installation.


Done! We now have Geode installed! If you had Geometry Dash installed from the Play Store or manually with an external launcher, you should now have the Geode button available to install mods.

We’ll install mandatory mods that enable texture pack compatibility over popular Geode mods, alongside “Happy Textures” for customizable window colors.
We will press the Geode button that appears

Next, we will tap “Get” to obtain these two absolutely necessary mods for texture packs to work.

To ensure proper loading and compatibility for texture packs downloaded from solubletexturepacks.com, it is mandatory to install Happy Textures and Texture Loader. We heavily utilize Happy Textures’ features to change UI window palettes and introduce custom sprites that vanilla Geometry Dash does not provide. Running without these can lead to broken graphics or missing UI assets.
If you don’t spot them right away, utilize the Search bar on the bottom right and type “texture”. The results should promptly include both tools.

Tap the blue Get button on both mods. I suggest beginning by acquiring Happy Textures; it will typically ask to download Texture Loader natively as a dependency, though installing them one by one is fine.

Once we tap install, it will ask to include the required mods. It is highly likely it will ask you to install other necessary mods; these are dependencies required by Happy Textures and Texture Loader. In fact, most mods use them. Accept the installation for all of them, including Alpha’s Geode Utils, Node IDs, Image Plus, and Texture Loader. We press continue.


We will have them installed once the process finishes, and it will ask us to restart the application to see the changes. We press the restart button.

Once the app restarts, it will return us to the main menu. We press the geode button again.
Done! In the installed mods window, we should see all these mods available and checked. We’ll leave it like this for now and move to the next step. We will return to this window later.

Head onto solubletexturepacks.com to download the packed ZIP archive for Geode by clicking its respective download link.
On the texture pack you wish to download from the website, press the Geode button and confirm the download of the .zip file.

We go to our phone’s downloads, in the default folder, and we will see a .zip file containing the texture pack adapted for Geode.

If you don’t have a program to open .zip files, install one like Zarchiver for Android. The texture packs are highly optimized to be 100% natively and visually compatible with Geometry Dash for Android and the 40 most popular Geode mods.
Don’t have a file manager? You’ll need it to install applications and also to extract files. I recommend opening the following card if you don’t have one as it will be necessary; I recommend ZArchiver.
DON’T HAVE A FILE EXTRACTOR?
Click to see how to install one
To install the texture pack for Vanilla Geometry Dash on Android, you’ll
need a file extractor. We’ll use ZArchiver, a .zip file extractor. As mentioned in
the guide, all downloadable files will be in .zip format, as it’s more
user-friendly for file storage. Also, due to Google’s policies, I can’t share the file directly,
so it must be compressed.
Search for ZArchiver on Google Play, or you can click the following link.
https://play.google.com/store/apps/details?id=ru.zdevs.zarchiver
However, feel free to use any mobile app you prefer, as long as it can extract .zip
files. Make sure the app has this function.
Once we have the .zip file in our downloads, what we’ll do is tap the file and select the option “Extract to./<Archive name>/”, which will leave us with a folder with the files for the Texture Pack.


Once we have extracted it, we will go into the resulting folder to see all the texture pack files. (We will use this later)


We’ll resume using the Geode Texture Loader mod that we installed to install our texture pack. To do this, we’ll access our device’s local files to locate the folder where we’ll install our texture packs for Geode.
Now I will open Geode again. It’s important to clarify that from now on we must open the Geode App on Android to have our mods available; we will no longer open the Geometry Dash app. Once we open Geode, we must press the “Launch” button to run our mods and enjoy Geometry Dash.

Now we will resume with Geode and the Texture Loader mod. What we’ll do is select the settings button.

Thanks to the Texture Loader mod, a textures button will be loaded; we select it.


Now we will press on the folder icon to see the texture packs path.

In my case, on my phone it took me to Google’s file manager, which isn’t useful for us since we need to move files. If it lets you choose an option, choose ZArchiver to navigate faster to the folder. Use the method you prefer, it’s exactly the same; I’ll go back to ZArchiver as it is more practical and visual.

Copy your texture pack files and paste them into the Texture Loader mod directory on your device to place your texture pack folder within the mod resources files.
First, we will return to the texture pack file in our downloads folder and enter the folder that was extracted.

We will hold down the folder with the Name of our texture pack (Metallic Texture Pack) to see the options menu and select copy or cut, whichever you prefer.


We will press the 2 dots and the up arrow icon to go backwards, and we need to reach the following path to paste our texture pack into the official folder so that our texture packs work.
Android/media/com.geode.launcher/game/geode/config/geode.texture-loader/packs/


Done! Our texture pack is now installed. We verify that it is properly installed, make sure to have it managed more or less like this:
Android/media/com.geode.launcher/game/geode/config/geode.texture-loader/packs/”TexturePackName”/ <—-Texture Pack Sheets


Now we will go to Geode and run it.
Open geode
Press the Textures button
You should see the texture pack you installed in the left “Available” window. If you don’t see it, press the refresh button to load available texture packs; if you did it correctly, it should appear.

Now we will drag the texture pack from Available to Applied to apply it, and then we press the apply button and we will have the texture pack installed!

Enjoy your texture pack with Geode!

And not just this one, you can install as many as you want! Just place them in the same path we saw
in the tutorial. Each texture pack must have the following structure:
/Name Texture Pack/ <—- texture pack files here
All of this in the path: Android/media/com.geode.launcher/game/geode/config/geode.texture-loader/packs/
If the folder to install texture packs happens to not be in that path, check it from the texture loader by pressing the folder icon to know the exact path without errors:
As is well known, the system can be somewhat more restricted than Windows, so you will need a descriptive tutorial on how to install a texture pack on MacOS.
Watch Geode MacOS Tutorial
Subsequently, you must introduce textures to Geode with the Texture Loader mod, just like in the PC Windows tutorial on this same page.
Follow the instructions to install Texture Loader and the necessary mods in
Geode from here but for MacOS:
👉 Go to Step 2: Install Texture Pack
Mods
An equivalent for a file extractor could be The Unarchiver for MacOS:
You can use it to follow the same steps to install a texture pack in Geode. The option you would have to choose to download a texture pack for Geode on MacOS is this button on the texture packs website:
The official Geode project provides two installation methods depending on how you manage sideloaded apps on your device.
- You must own the official version of Geometry Dash from the App Store.
- A computer (Windows, macOS or Linux) and a USB cable are required.
- An Apple ID and internet connection.
- Developer Mode must be enabled on iOS.
These methods install Geode using sideloading tools, which allow apps outside the App Store to run.
Recommended for most users. Supported on iOS 16 – iOS 17.4+.
Install SideStore on your device using a computer. You’ll need the program iloader and LocalDevVPN.
📘 See SideStore InstructionsSettings → Privacy & Security → Developer Mode. Your device will restart.
Open SideStore, tap (+), and select the Geode IPA, OR add the Geode source:
https://ios-repo.geode-sdk.org/altsource/main.json
For full mod support, you must enable JIT using tools like StikDebug. Without JIT, only partial mod support will be available.
For the full step-by-step installation guide with screenshots, please visit the official page:
📘 Modern iOS Detailed Guide (Official)
Intended for users who already use LiveContainer. Supported on iOS 15+.
Bypasses Apple’s 3-app limit by running apps inside a container. Requires specific settings inside LiveContainer (Launch with JIT, disable TweakLoader injection).
For the full step-by-step installation guide with screenshots, please visit the official page:
📘 LiveContainer Detailed Guide (Official)
Once Geode is successfully installed on your iPhone/iPad, follow the
instructions to install Texture Loader and the necessary mods from here but for iOS:
👉 Go to Step 2: Install Texture Pack
Mods
First you must install Geode on your Linux device. In the Geode FAQ section, you can see how to install Geode on Linux.
Geometry Dash is not available on Linux. However, we can run it easily using Wine, a compatibility layer. Make sure you have it installed, then open the Windows version of the installer with Wine. Your root filesystem will appear as the Z: disk in the installer.
After installation, Geode on Linux requires one extra step to function correctly. You need to set DLL overrides for Wine to allow Geode to load properly.
In Steam, right click on Geometry Dash, click on Properties, and inside Launch Options enter the following:
WINEDLLOVERRIDES=”xinput1_4=n,b” %command%
If you are launching Geometry Dash in another way than Steam, you must set DLL overrides using your preferred method.
These videos can help you install Geode on Linux for Steam and Steam Deck:
Once Geode is installed on Linux, follow the PC instructions to install Texture
Pack Loader and other necessary mods:
👉 Go to Step 2: Install Texture Pack
Mods
We’ll install mandatory mods that enable texture pack compatibility over popular Geode mods, alongside “Happy Textures” for customizable window colors.
- Back up early: Always duplicate your GD folder before tinkering.
- Cloud Save first: Never uninstall GD on Android without a fresh cloud save.
- Trusted source: Only download from solubletexturepacks.com.
- Check extensions: Files should end in
.png,.apkBeware of unexpected.exefiles in a Texture Pack
Thank you for following this guide! If you need personalized help, join our Discord server — our moderators and veteran GD players are ready to assist. Enjoy your new textures!
To complement our guide, this section provides answers to the most frequently asked questions. We offer personalized support through our community to ensure you have the best experience installing your texture packs.
If you have specific doubts or encounter unusual errors, we recommend visiting our comprehensive FAQ page where we analyze the most common situations in detail.
Our goal is to help you resolve any issues quickly and efficiently. Don’t hesitate to consult the resources available!
You can open a ticket for personalized support by joining our Discord server:
Join Discord Server
You can open a ticket in the TP-Support channel

We do not accept requests for custom texture packs; custom packs are exclusive to official store buyers.
104 thoughts on “How to install a Texture Pack (PC Windows, Android, MacOS, iOS, Linux & Geode)”